

How To Install Os X Yosemite On An Unsupported Mac
Software & Apps
How to keep older Macs secure: a geeky approach (run Catalina on unsupported Macs)
Posted on October 8th, 2019 by

Note: This article was originally written for macOS Mojave, and has been adapted for macOS Catalina.
From a security standpoint, using the latest version of macOS—the Mac operating system—is always preferred. However, if your Mac is several years old, there's a good chance that the current version of macOS won't run on your Mac; Apple drops support for Mac models that it declares to be vintage or obsolete.
If you want to upgrade to a newer version of macOS but Apple no longer supports your Mac, the best option is of course to buy a new Mac, but not everyone can afford to do so. What if I told you there are ways to keep your old Mac running a safe version of macOS for longer? There are two options:
- If you can't upgrade to the latest version of macOS, install the latest compatible version that still receives security updates. At the time of writing, the current version of macOS is Catalina (10.15.x), and the two previous versions are Mojave (10.14.6) and macOS High Sierra (10.13.6). Keep in mind that even though these two older macOS versions still receive security updates, not all known vulnerabilities are addressed.
- Use a third-party utility to install the latest macOS on your Mac, even if Apple doesn't officially support it. Sounds interesting, doesn't it?
According to Apple, these are the supported models for macOS 10.15 Catalina:
MacBook (Early 2015 or newer)
MacBook Air (Mid 2012 or newer)
MacBook Pro (Mid 2012 or newer)
Mac mini (Late 2012 or newer)
iMac (Late 2012 or newer)
iMac Pro (Late 2017 or newer)
Mac Pro (Late 2013 or newer)
The unofficial list, however, looks more like this:
MacBook (Early 2009 or newer)
MacBook Air (Late 2008 or newer)
MacBook Pro (Early 2008 or newer)
Mac mini (Early 2009 or newer)
iMac (Mid 2007, after upgrading the CPU)*
iMac (Early 2008 or newer, except for some 2010 models and all 2011 models)
iMac Pro (2017 or newer)
Mac Pro (Early 2008 or newer with recommended graphics cards)
Xserve (Early 2008 or newer)
*With a processor upgrade (not for the faint of heart), the unofficial list can even include the mid-2007 iMac, a computer that is now more than a dozen years old.
Well, folks, @dosdude1 wins the Internet today. I've successfully installed macOS Catalina on a 2007 iMac.*
(*This iMac required a CPU upgrade; the chipset misidentifies 2.6 GHz as 700 MHz 🤣. But many ≥2008 Macs can be upgraded to #macOSCatalina without hardware changes!) pic.twitter.com/PWnINBJRm6
— Josh Long (the JoshMeister) (@theJoshMeister) October 8, 2019
The unofficial list looks a lot better, doesn't it? Perhaps it seems too good to be true, and to be fair, there are some known issues with certain models (see below, and the Catalina Patcher homepage, for details).
You might be wondering how this works. It uses a similar methodology to so-called "hackintosh" computers, where additional Apple drivers from previous versions of the operating system are included to make the current version of macOS work with a wider range of hardware.
Preparing to patch
If you want to run macOS Catalina but can't due to your Mac not being officially supported, here is how to go about it:
- Back up all your data. Follow a "3-2-1" backup strategy, and ensure that your backups are really working.
- Grab a flash drive (or external hard drive) that can be erased and is 16 GB or larger in size.
- Now grab a copy of macOS Catalina Patcher from this website (you can also get the Mojave and High Sierra patchers if you have a Mac with certain hardware that can't be made to work with Catalina).
- While you're there, give the page a careful read to see if your Mac is properly supported by the patcher and what known issues there might be.
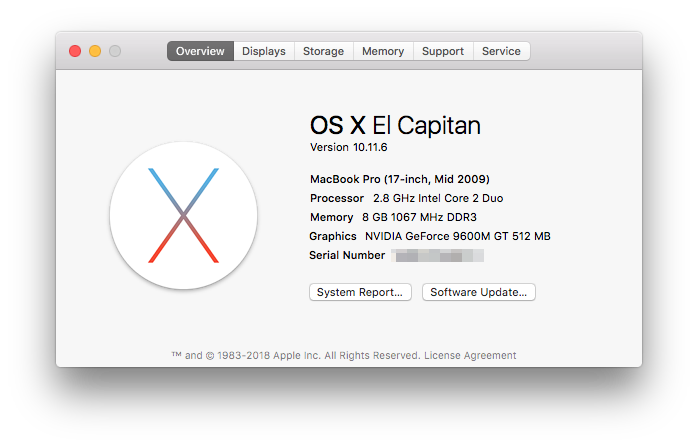
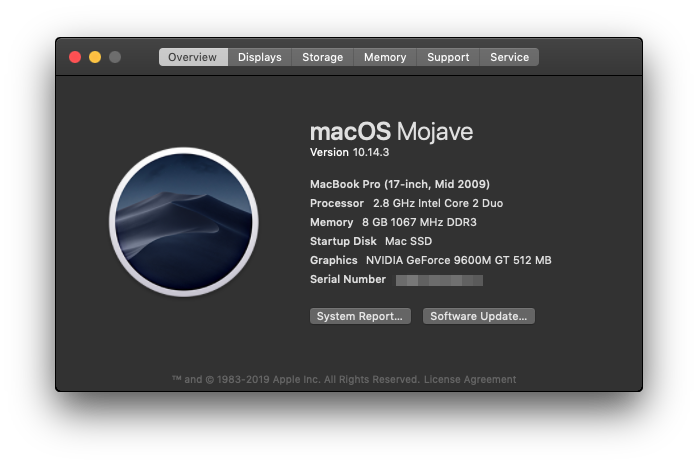
- Go to your Apple menu and pull up "About This Mac." From there, click on "System Report" or "System Information" (note that the wording may vary depending on the OS you have installed). In the hardware overview window that pops up, a Model Identifier will be listed; make sure you write it down or remember what this is.
You can find all the steps on the macOS Catalina Patcher website, but I'll be taking the journey with you using my Mid-2009, 17″ MacBook Pro. This system is several years older than the minimum Apple says is supported. According to the System Report, my MacBook Pro is a MacBookPro5,2.
I have installed this patch on even older systems such as the Late 2008 Aluminum Unibody MacBook, and it ran Mojave very well. Of course it is recommended you upgrade your Mac to the maximum amount of RAM and replace your hard drive with a solid state drive (SSD). This will make your machine run a lot smoother regardless of which OS you decide to install. And now for the step-by-step guide on installing macOS 10.15 Catalina on your unsupported Mac!
How to install macOS Catalina on an unsupported Mac
Here's the official video guide by the creator of Catalina Patcher:
You can also follow along with the step-by-step outline below. Note that the screenshots below actually show Mojave Patcher (from an upgrade to macOS Mojave, last year), but the process remains essentially the same.
- Format your flash drive or external drive using Disk Utility. Make sure it is formatted as Mac OS Extended (Journaled).
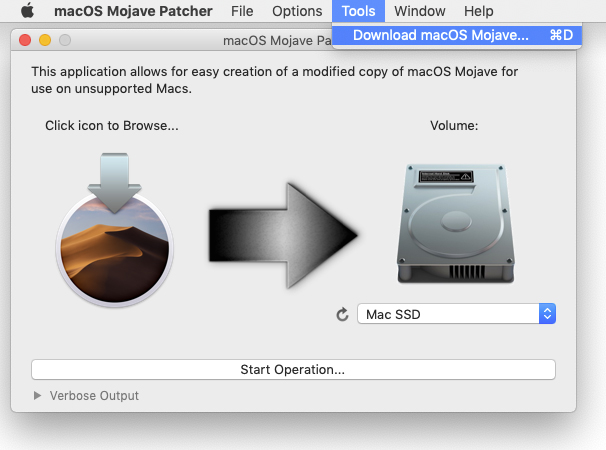
- Open the downloaded macOS Catalina Patcher tool, and from the Tools menu, select "Download macOS Catalina."
This will download the latest copy of the installer directly from Apple's server.
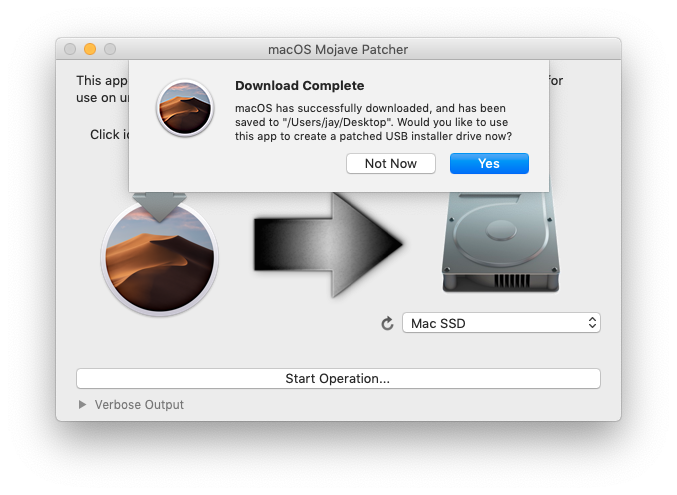
- When the download finishes and the installer is verified, continue with the creation of the installer.
Make sure you set your destination volume to the flash drive after selecting "Yes"
- With the correct destination volume selected, click "Start Operation"
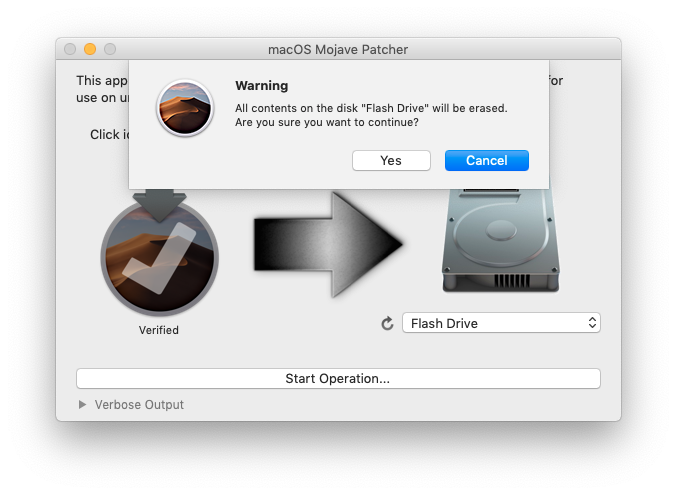
- The patcher at this point will ask you for your password. Once that is entered the creation will begin.
Once the patcher tells you it has completed the process, you can quit the patcher.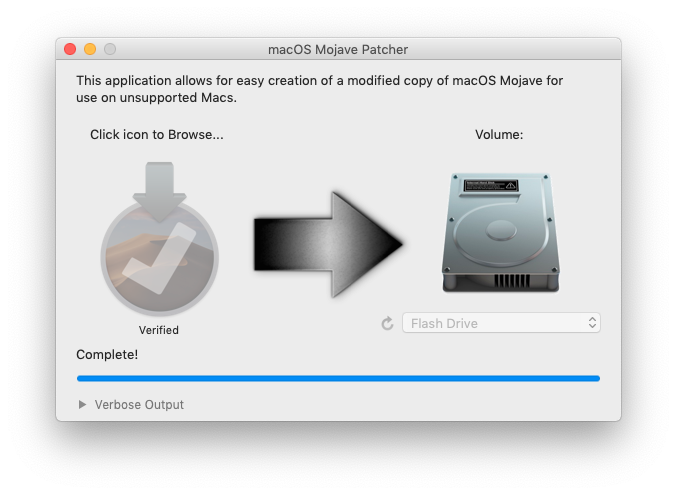
- Now it's time to install the new OS on your Mac! Power on your Mac and immediately hold down the option (or 'alt') key.
Give it several seconds, and then you should be looking at a grey screen with a selection of boot volumes. Select the flash drive that has the patched macOS installer on it and press your return (or 'enter') key. The Mac will now start booting up from the flash drive, and depending on the age and speed of your Mac and your USB drive, this may take a few minutes. - Once the installer loads you'll notice an additional window that you won't find on a typical macOS install.
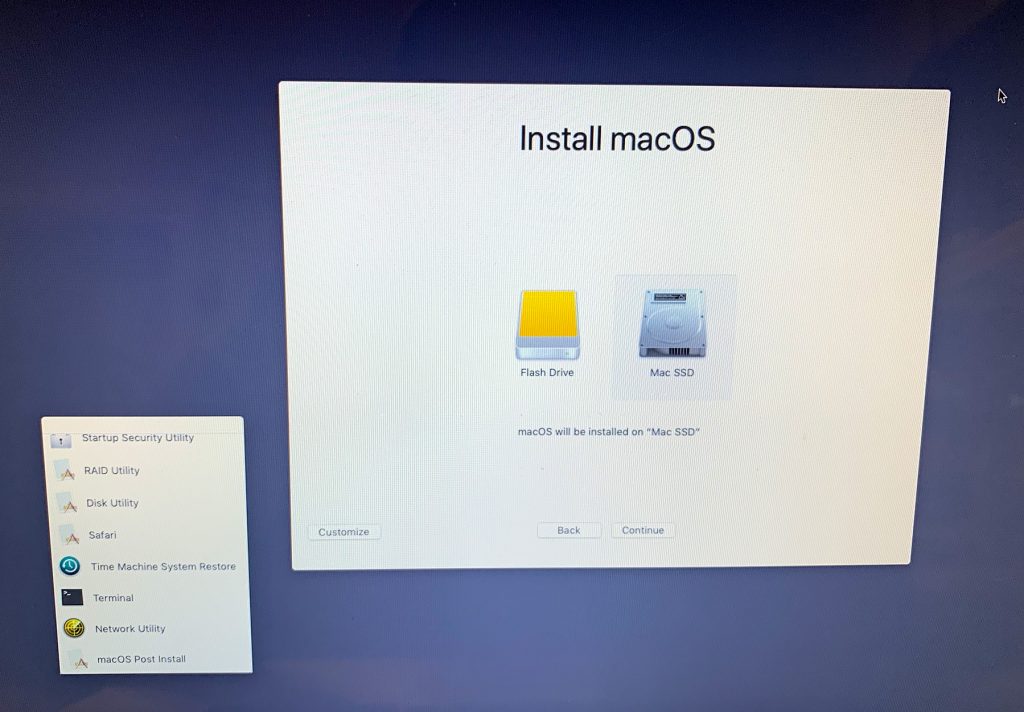
From this window, select Disk Utility and reformat your internal drive—note that this will erase all your files, so you need to make sure you've properly backed up all your important documents before proceeding beyond this point. Make sure the format is set to Mac OS Extended (Journaled) and the partition scheme is set to APFS.
With the internal drive reformatted and ready, quit Disk Utility and select the internal drive as the installation destination. Then click Continue and let the installer run as you normally would. - When the installer finishes the Mac will attempt to restart from your internal drive. This will fail and your Mac will shut down—don't worry; this is expected behavior.
- Power on your Mac again with the option key held down, just like you did in step 6. Select the patched installer flash drive again and boot up from that.
- From the window where you earlier selected Disk Utility, this time open "macOS Post Install." A new window will open where you have to select your Mac's model identifier. Select the Model Identifier you wrote down earlier and all the right options will be automatically selected for your Mac.
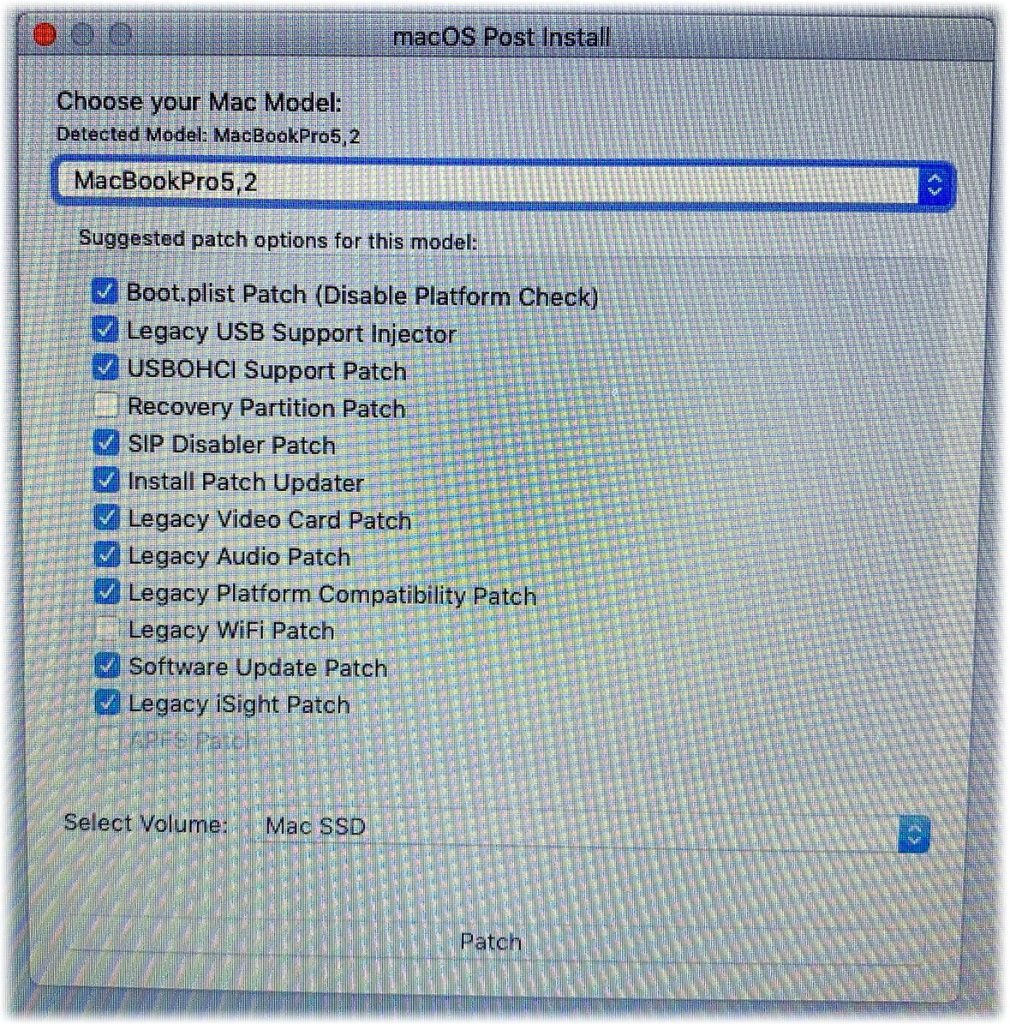
Select your internal drive from the menu next to "Select Volume" at the bottom and click the "Patch" button. - When the patch completes its work, select the "Force Cache Rebuild" option and then click the "Reboot" button.
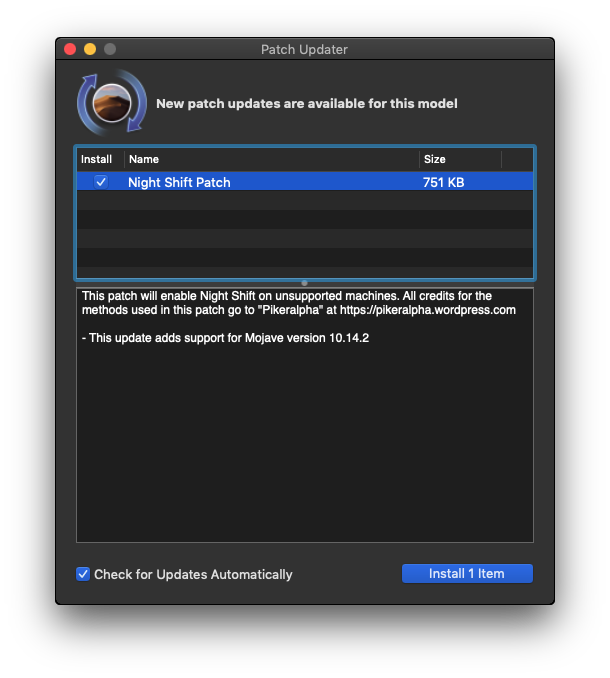
The caches will be rebuilt and the Mac will restart. This may take a few minutes longer than usual. - Your Mac will now boot into Catalina and (almost) everything will work just like it does on a Mac that officially supports it! Follow the macOS Setup Assistant (check out that Dark Mode!) and when that's done you may be presented with a software update window. This is the Patch Updater which will ensure you have the latest patches available for best compatibility. Install whatever updates are available and restart your Mac.
You're all set! Your Apple-unsupported Mac is now running macOS Catalina 10.15! (Or, again, macOS Mojave in these example screenshots from last year's upgrade.)
If the installation was successful and you're thrilled to be able to run the latest operating system on your old Mac hardware, consider donating to the creator of Catalina Patcher to express your appreciation for his hard work. You can find a Donate button at the top of the Catalina Patcher site.
A few words of caution
- If you did not select the Dark Mode and notice your menu bar is a dark gray color, your graphics card may be having a hard time (typically this happens with graphics cards that do not support Metal). If you switch to Dark Mode this will resolve it though.
- Depending on the age of your machine, using Group FaceTime may not be the smoothest experience. It will work, but frame rates may be low. My Mid-2009 MacBook Pro pulls off a seven-person group chat, but it's certainly not as smooth as it is on my Mac Pro or iPhone.
- My iSight camera works fine, but as the macOS Mojave Patcher website mentions, "built-in iSight cameras do not work correctly on some machines. It seems to be hit or miss, but when installing, expect your iSight camera to be non-functional."
- Hang onto the flash drive with the patched installer on it! You will need it after installing future OS updates to re-install the Post Install Patches. You may also want to hold off on installing future updates until the developer mentions any potential issues on his website (all the way down at the bottom) to avoid any unpleasant surprises.
- You are now running macOS on an unsupported machine. While I have personally used these patchers for years without issue, as have others, issues may arise. So always make sure your backups are up to date!
Your older Mac will now be able to keep up with the latest security updates. Although firmware updates are not included (those are model-specific, and Apple only releases them for supported Macs), your macOS will nevertheless be more secure than it was with the old version of Mac OS X you were likely running. Every time a new macOS is released, I look forward to the next macOS Patcher, as it keeps our beloved—and still more than capable—old Macs around for just a while longer.
How can I learn more?
 Each week on the Intego Mac Podcast, Intego's Mac security experts discuss the latest Apple news, security and privacy stories, and offer practical advice on getting the most out of your Apple devices. Be sure to follow the podcast to make sure you don't miss any episodes.
You can also subscribe to our e-mail newsletter and keep an eye here on Mac Security Blog for the latest Apple security and privacy news. And don't forget to follow Intego on your favorite social media channels: Facebook, Instagram, Twitter, and YouTube.

About Jay Vrijenhoek
Jay Vrijenhoek is an IT consultant with a passion for Mac security research. View all posts by Jay Vrijenhoek →How To Install Os X Yosemite On An Unsupported Mac
Source: https://www.intego.com/mac-security-blog/how-to-keep-older-macs-secure-a-geeky-approach/
Posted by: foxsillon.blogspot.com
0 Response to "How To Install Os X Yosemite On An Unsupported Mac"
Post a Comment